Welcome to this guide on using a cladding cost calculator in NZ, where you’ll learn how to estimate costs with confidence, understand what drives prices up or down, and choose the right materials for your home while avoiding common budgeting mistakes that catch many homeowners off guard, giving you a clearer path from planning to installation, whether you’re refreshing an older property or starting a new build, and helping you feel more prepared as you compare quotes, weigh your options, and make decisions that fit your budget and long-term goals.
A cladding cost calculator in NZ helps homeowners estimate the price of replacing or installing exterior cladding by using details like home size, materials, labour, and site conditions. It gives a quick cost range so you can prepare a realistic budget before getting quotes from builders.
Cladding Cost Calculator NZ
Total Estimated Cost: NZD $0.00
Table of Contents
What A Cladding Cost Calculator In NZ Actually Does
A cladding cost calculator gives you a clear starting point when you want to understand how much it might cost to install or replace exterior cladding on your home. It breaks the process into simple inputs so you can see how different choices affect the total price. Many homeowners use it before talking to builders because it offers a quick way to estimate the scale of the project.
Purpose Of The Tool
A calculator lets you plug in basic details like the size of your home, the type of cladding you want, and any extra work you expect. It then produces a rough estimate so you can see whether your plans fit your budget. Instead of guessing or relying on general price ranges, you get a more focused number based on your specific project. This helps you understand what to expect before you commit to quotes or consultations.
Why NZ Homeowners Search For It
People across New Zealand often look for this tool because cladding prices can vary from one region to another. Labour rates, transport costs, and material availability can shift the final amount by a wide margin. Homeowners want a way to compare options quickly so they can make early decisions without feeling overwhelmed. A calculator gives them clarity at the start of their planning process.
What Problems It Solves
A cladding cost calculator removes guesswork and reduces the stress of not knowing where your budget stands. It helps you see how changes in material type, home size, or installation needs affect the total cost. It also highlights areas where you may be underestimating the work, such as old cladding removal or added weatherproofing. This protects you from surprise expenses later on.
How It Helps With Planning And Budgeting
When you have a clear estimate, you can plan your next steps with more confidence. You can compare materials, set aside a realistic budget, and decide when to bring in professionals. The calculator also shows how small changes influence the final number, giving you room to adjust your project without losing control of your spending.
This section sets the foundation for understanding why early cost estimation matters and how a simple tool can guide better decisions as you move into the next stages of your cladding project.

Why Cladding Costs Vary Across New Zealand
Cladding prices shift from one part of the country to another because each region faces different supply conditions, labour demands, and installation challenges. When you look closer at these factors, it becomes easier to understand why two quotes for the same material can produce very different totals. This helps you plan more accurately and avoid surprises once work begins.
Price Differences Between Regions
Regional pricing often reflects the cost of living, local economic activity, and how busy tradespeople are in that area. Larger cities usually have higher rates because builders handle more projects and competition for skilled labour is stronger. Smaller towns may offer lower prices, but availability can be irregular during peak seasons. Homeowners often notice this difference when gathering quotes from both local and nearby regions.
Labour Availability
The number of qualified installers in your area plays a major role in final pricing. Areas with strong building activity can face labour shortages, which pushes rates higher. Regions with fewer active projects may offer more competitive labour costs, but scheduling might require more patience. Skilled cladding work takes time and experience, so labour quality also influences the overall cost you see on a quote.
Transport And Material Supply
Material supply chains vary across the country. Some regions sit close to major distributors, which reduces transport fees and keeps prices steady. More remote areas may rely on materials being shipped over long distances, and that added transport cost shows up in your estimate. Availability can shift based on demand, shipping delays, or seasonal building spikes, making certain materials more expensive at specific times of the year.
Weather Factors During Installation
Weather influences both the timeline and the cost of cladding projects in New Zealand. Wet or windy months slow down installation, increase labour hours, and sometimes require additional preparation to protect the home during the process. Regions with heavy rainfall or unpredictable storms often face higher costs because installers must work around conditions that can affect quality and safety. Longer installation windows naturally raise the overall budget.
Common Questions Homeowners Ask When Comparing Quotes
Homeowners often want to know why similar projects come back with price differences. Some of the most frequent questions include:
- Is the material quality the same across both quotes?
- Are labour rates influenced by local demand?
- Does one quote include transport, scaffolding, or waste removal that the other leaves out?
- Are weather delays factored into the projected timeline?
- How much of the cost difference relates to regional pricing rather than project specifics?
Each question highlights a common concern about fairness and transparency. Taking time to ask these details helps you compare quotes accurately rather than choosing based on price alone.
A clear understanding of how regional factors affect cladding costs gives you more control as you plan your project. It also helps you set realistic expectations before you begin gathering quotes from builders in your area.
Main Cladding Types And Their Rough Cost Ranges
Every homeowner in New Zealand faces different needs when choosing exterior cladding. Costs shift based on material quality, installation demands, and long-term upkeep. The sections below give clear pricing expectations so you can make sense of your budget before using any calculator.
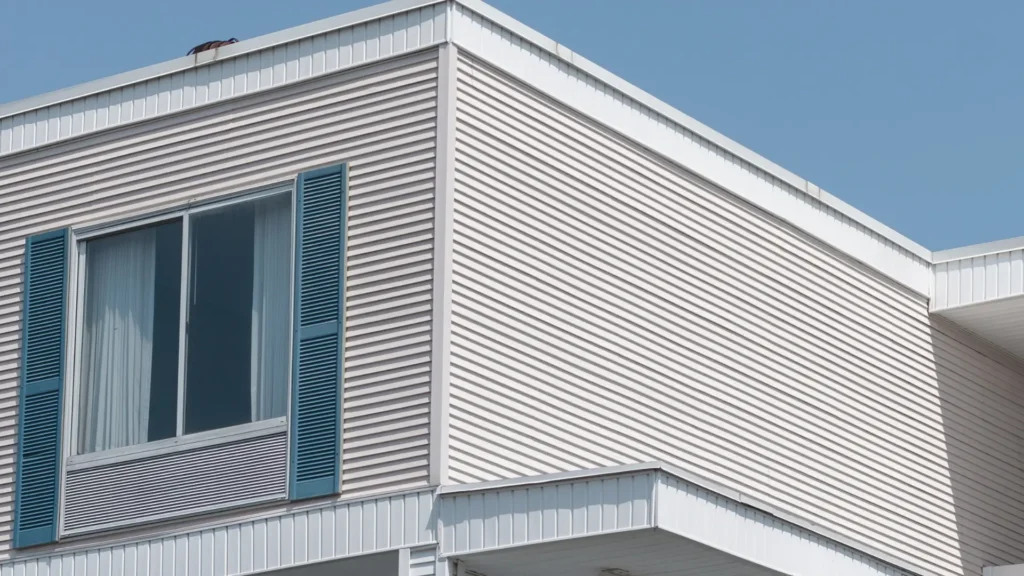
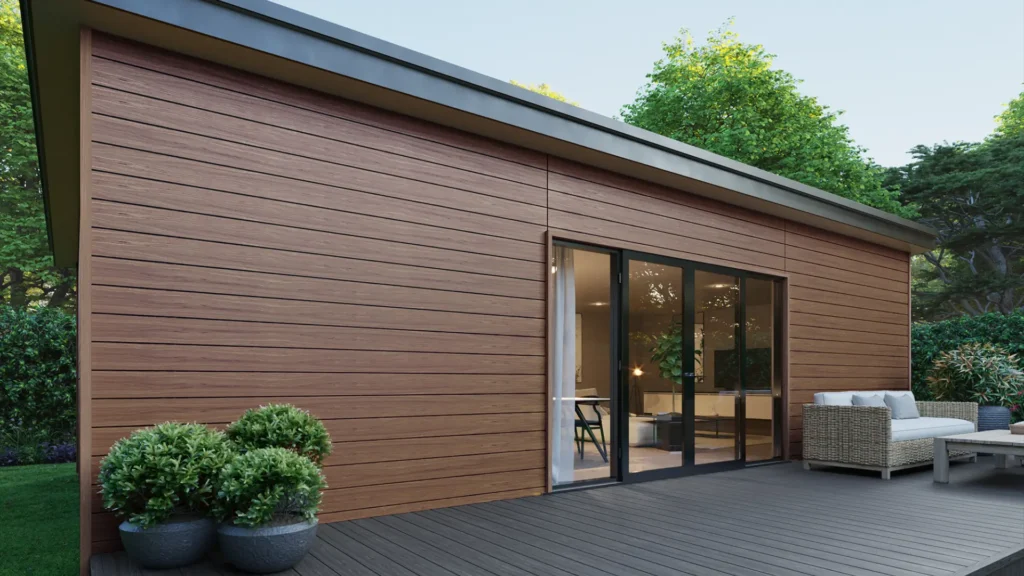
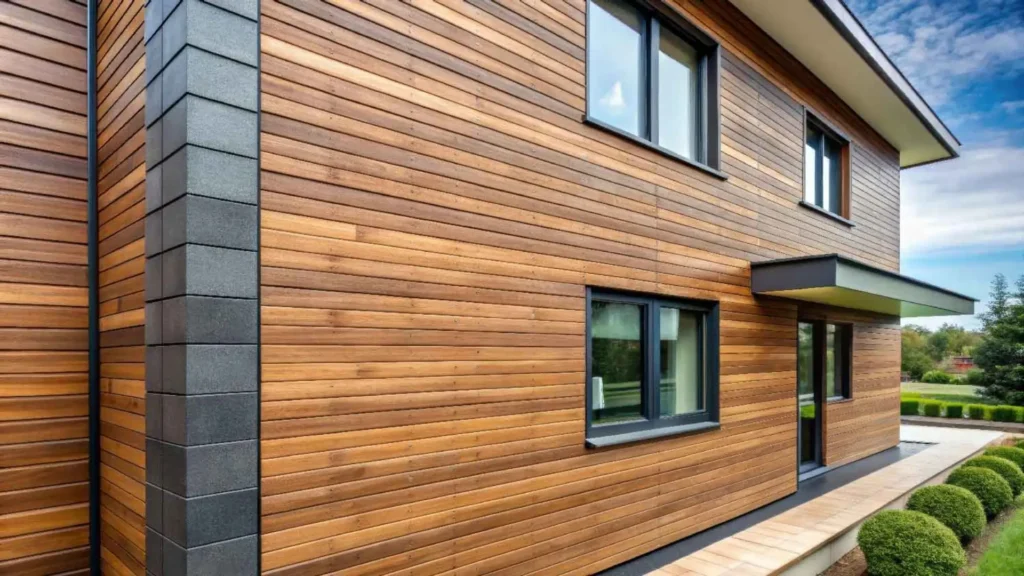
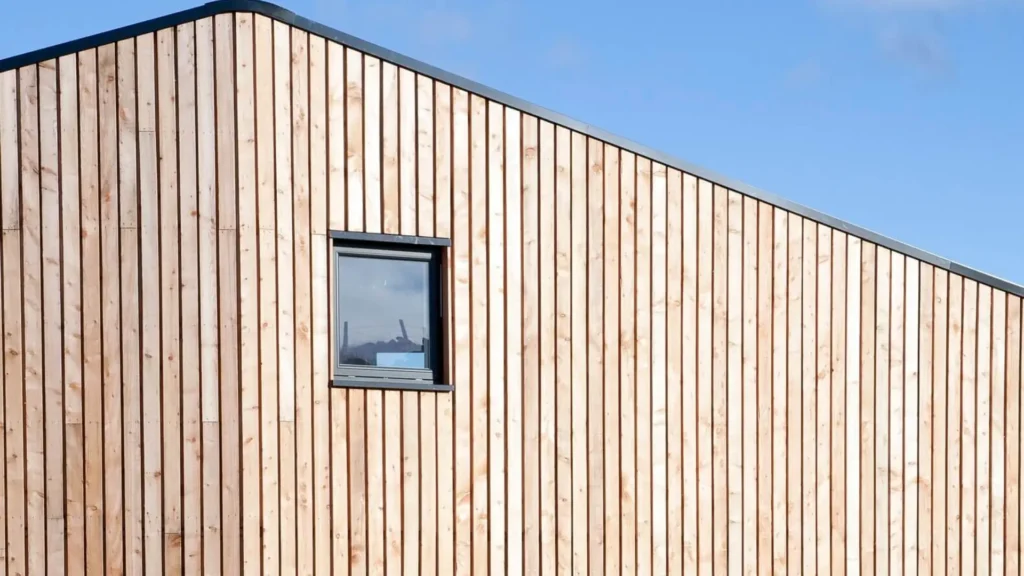
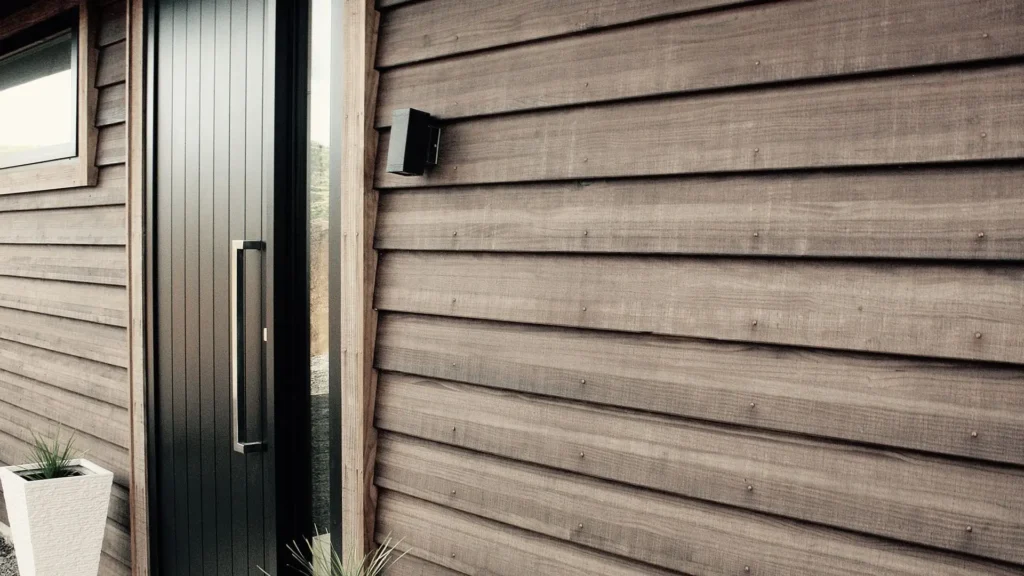
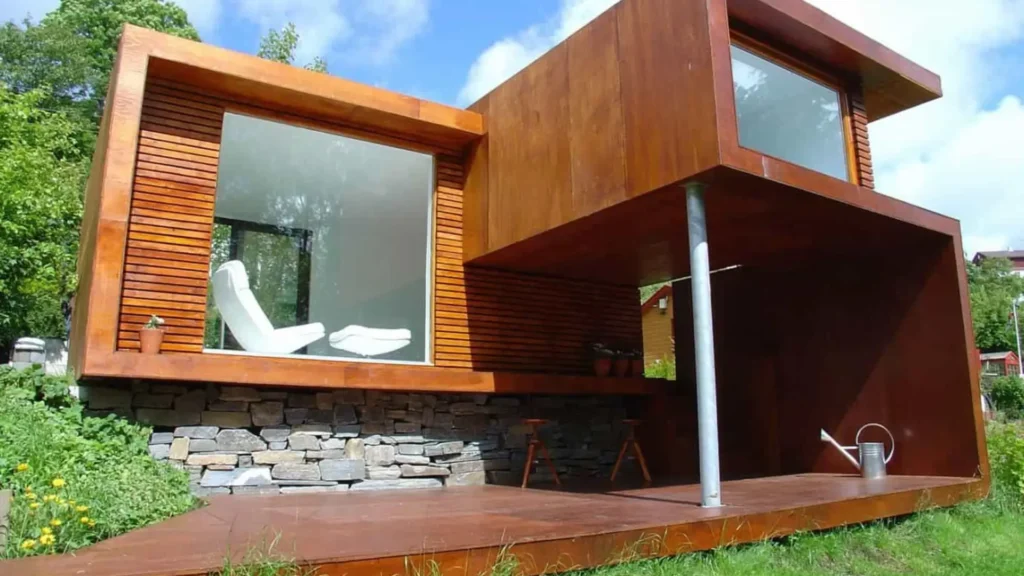
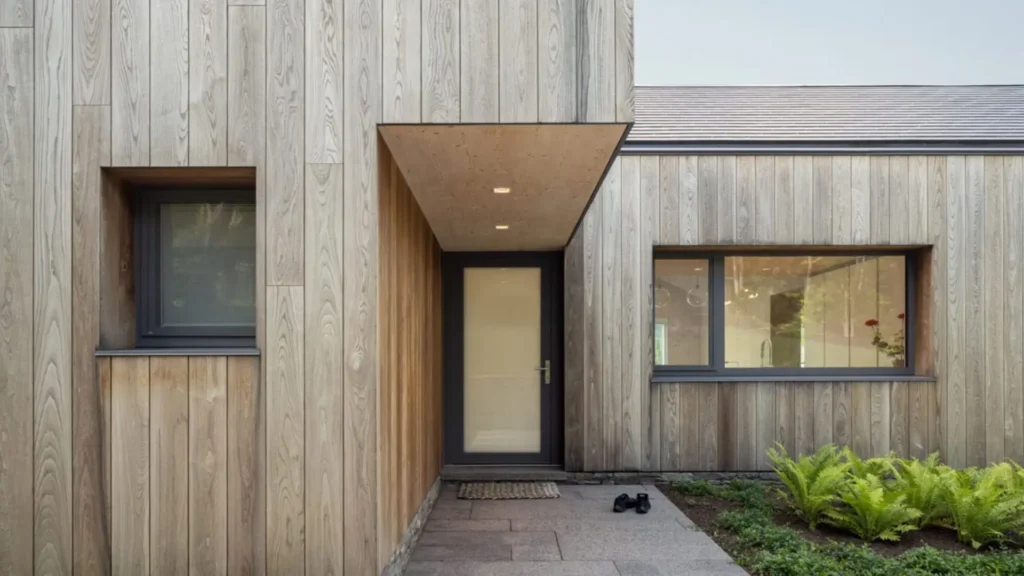
Timber
Timber remains a familiar sight across many New Zealand homes because it offers a natural look and fits both older and modern designs. It can suit many budgets, but prices change depending on the wood type and finish.
- Expected Price Range
Timber cladding often sits in the mid to high price bracket. Softwoods like pine cost less, while hardwoods or specialty weatherboards cost more due to their durability and appearance. - Pros And Cons
Timber offers a warm finish and can be repaired easily. It also lets you repaint or stain your home whenever you want a change. The downside is maintenance. Boards need regular checking, repainting, and protection from moisture and pests. - When People In NZ Choose It
Homeowners choose timber when they want a classic look that aligns with many older suburbs. It is also common for renovation projects where matching existing materials matters.
Vinyl
Vinyl cladding appeals to homeowners who want a quick upgrade without taking on heavy maintenance. It gives a modern look at an approachable cost.
- Typical Costs
Vinyl is one of the more affordable cladding materials available. The total project price remains lower because installation tends to be straightforward. - Why Some Homeowners Pick It
People choose vinyl because it is simple to maintain, resistant to fading, and available in many colours. It also suits families who want a cost-effective exterior that still looks tidy. - Situations Where It Fits Well
Vinyl is a practical choice for budget-focused renovations or landlords wanting a durable option without ongoing upkeep. It works well in regions with stable weather conditions.
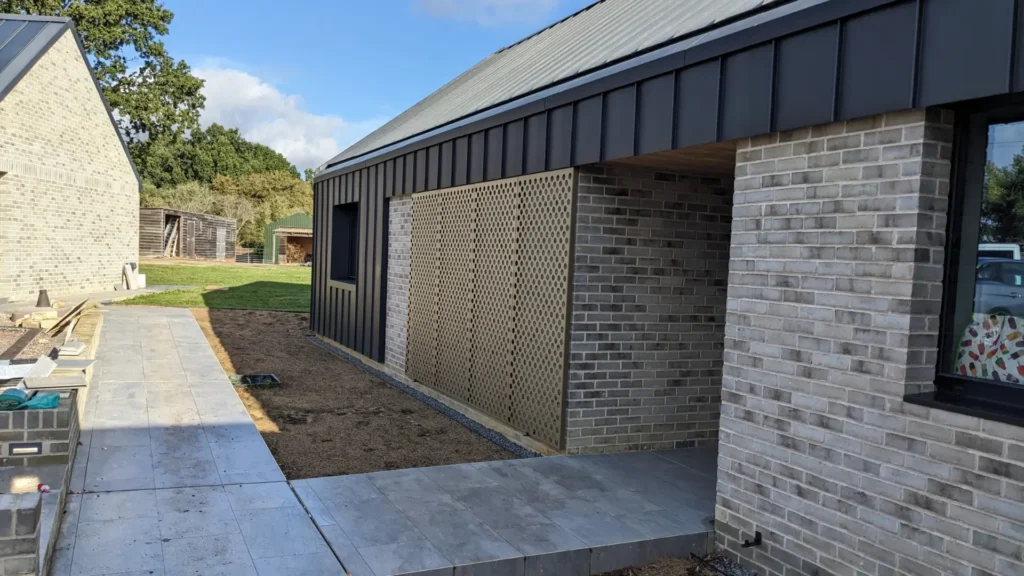
Brick
Brick cladding offers a strong and timeless structure. It is known for durability and gives a home a premium feel.
- Price Considerations
Brick sits at the higher end of the cost scale. Materials and labour both contribute to this. Laying bricks requires skilled tradespeople, which adds to the total. - What Drives The Higher Cost
The installation process is detailed and takes longer than other cladding types. Transporting materials and preparing the site increases costs further. - Long Term Durability
Brick lasts for decades with minimal upkeep. It resists fire, weather exposure, and damage from moisture. Many homeowners choose it for its longevity rather than its upfront price.
Metal
Metal cladding continues to grow in popularity across new builds and lifestyle homes. It suits both rural and urban projects.
- Cost Range
Metal prices vary widely. Standard steel panels are more affordable, while premium coated products cost more due to added protection against corrosion. - When Metal Offers The Best Value
Metal becomes a strong choice when a property sits in a harsh climate or coastal area. It handles wind, rain, and salt exposure better than many other materials. It also supports modern architectural styles.
Fibre Cement
Fibre cement offers a balance between price, appearance, and durability. It has become a common choice for many new residential developments.
- Price Expectations
It lands in the mid-range price bracket. The cost of installation is manageable, and boards come in styles that mimic pricier materials like timber. - Why New Builds Use It Often
Builders like fibre cement because it resists rot, pests, and fire. It needs less maintenance than timber and can be painted in a wide range of colours. It also offers consistent quality, which suits large housing projects.
This overview gives you a clearer idea of what each material offers and how costs differ. These insights help you approach any cladding calculator with realistic expectations and a better understanding of which option fits your home and budget.
Key Factors That Influence Cladding Cost
Understanding what drives the total cost of cladding helps you plan better and avoid budget surprises. Each project has its own conditions, so looking closely at these factors gives you a clearer idea of where your money goes and why quotes can vary.
Size Of The Home
The size of your home has a direct impact on cladding costs because more surface area means more materials and longer labour hours. A small home might only need a modest amount of cladding, while larger properties require a bigger budget due to the volume of panels, fixings, and preparation work. When you measure your exterior correctly, you get closer to an accurate estimate and reduce the risk of under-budgeting.
Shape And Complexity Of The Exterior
Simple, flat walls are easier and faster to cover, which keeps labour costs manageable. Homes with many corners, varying heights, or architectural details take more time and skill to clad. Installers need to cut materials more precisely, work around obstacles, and complete extra finishing tasks. This added complexity often raises the total price even if the home is not much larger than a simpler structure.
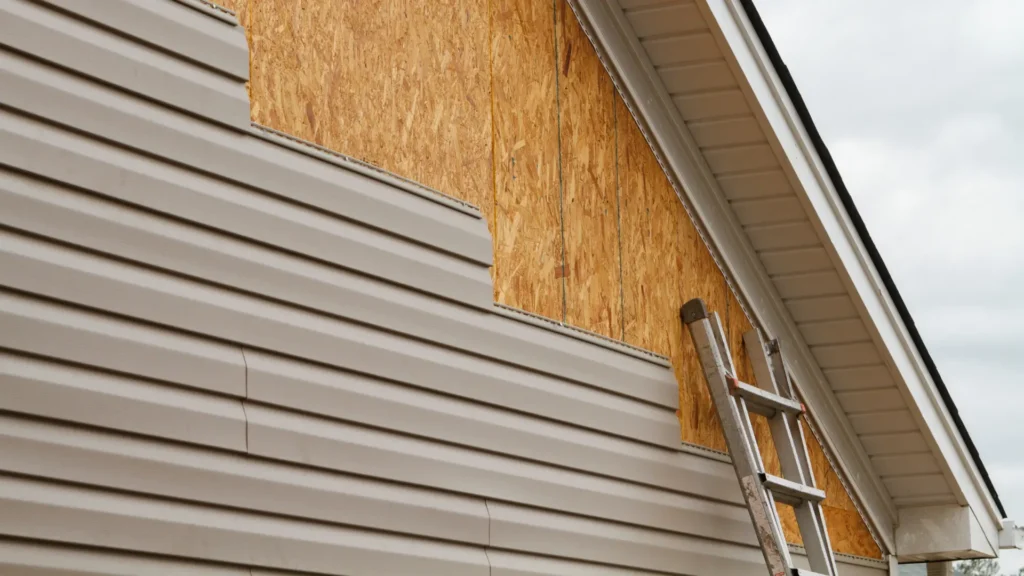
Removal Of Old Cladding
If your project involves replacing existing cladding, removal costs play a major role. Some materials strip away easily, while others need careful dismantling to protect the framing underneath. If the old cladding shows signs of water damage, rot, or poor installation, repairs may be required before new materials can go on. This stage often becomes one of the biggest variables in a quote because hidden damage can change the scope of the work.
Scaffolding Needs
Many cladding projects need scaffolding for safety and access. The higher or more complex your home is, the more extensive the scaffolding setup becomes. This includes rental fees, installation, and removal. Working from scaffolding also takes more time, which affects labour. Homes built on sloped or uneven ground often need special setups that further increase the cost.
Extra Weatherproofing Or Insulation
New Zealand’s building conditions often require updates to weatherproofing layers or additional insulation behind the cladding. These improvements protect your home from moisture damage and help meet performance standards. While they add cost upfront, they usually provide strong long-term value. If your home is older, the chances of needing upgraded membranes or insulation are higher, which can influence the final quote.
Local Building Rules
Different councils in New Zealand may have varying requirements for cladding materials, fire ratings, or weatherproofing standards. Some regions need extra documentation or inspections, which can add time and cost to a project. Meeting these rules is essential for keeping your home compliant and ensuring the work passes final checks.
How Each Factor Changes A Quote
Every factor above influences cost in its own way, but they often combine to create a unique price for each home. A simple, single-story house with easy access may receive a straightforward quote, while a multi-level home with outdated cladding and complex features might come back significantly higher. When contractors assess your property, they look at all these elements rather than relying on a single measurement.
These factors give you a clearer view of what shapes the final cost of cladding and help you make informed decisions as you plan your project.
How A Cladding Cost Calculator Works
A cladding cost calculator gives you a quick way to understand the possible price of recladding or cladding a home in New Zealand. It uses your project details to build an estimate that reflects real conditions, material choices, and the size of your home. The goal is to help you plan your budget before speaking with a builder.
Data The Tool Asks For
Most calculators start with a few simple questions so they can produce a useful estimate. You will usually enter the total exterior wall area or the basic measurements of your home. The tool may ask for the height of each wall, the number of storeys, and whether your home has extra features like gables or complex shapes. You might also select the type of cladding you plan to use, because each material has its own price range. Some tools include options for labour, scaffolding, and removal of old cladding. The more details you provide, the closer the estimate will be to what you might pay.
How It Uses Measurements
Once you supply the measurements, the calculator turns them into a total square metre figure. This gives the tool a base area to price. It then applies the selected material cost per square metre and adds any extra allowances such as labour, building paper, fixings, or safety requirements. If your home is larger or has irregular shapes, the tool adjusts the figures to match the extra time and materials needed. This helps you understand why two homes of similar size can still have different price outcomes.
Why Estimates Change As You Adjust Inputs
Each input affects the final number. When you switch from fibre cement to timber, you change the cost per square metre. Adding scaffolding increases the labour section. Changing your wall height alters the total square metres the installer must work with. This is why the estimate shifts even with minor adjustments. The tool reacts the same way a builder would when preparing a manual quote, because every project detail influences the final scope.
A Short Example: Walking Readers Through A Simple Calculation
Imagine you enter a 100 square metre exterior area into the calculator. You choose fibre cement at a mid-range price. The tool multiplies the material rate by your total area, then adds the typical labour cost for a home of that size. If you select removal of old cladding, the tool adds that cost. If your home is two storeys, it factors in extra labour time and scaffolding. After processing each selection, it gives you a clear estimate so you can see how each choice shapes the final number.
This section helps you understand how these calculators turn simple details into a practical estimate. You can now use the tool with more confidence and read your results with a clearer perspective.

Common Mistakes People Make When Using Cost Calculators
Many homeowners use cladding calculators to get a quick cost estimate, but small errors can lead to big differences between the projected price and the final quote. Understanding where these mistakes happen helps you get a more realistic number before you begin comparing materials or speaking with contractors.
Underestimating Size
One of the most frequent issues comes from entering the wrong measurements. A small mistake in wall height or exterior area can change the estimate by thousands of dollars. Some people only measure the flat wall sections without accounting for extra surfaces created by gables, corners, or architectural features. This leads to an estimate that looks affordable but does not match the real material requirements. If you want a closer result, take your time with measurements and double-check the numbers before using any calculator.
Forgetting Labour and Site Prep
Many calculators focus heavily on material costs, so it’s easy to overlook labour and preparation work. Labour often makes up a large part of the total price, and the rates vary depending on skill level and demand in your area. Site preparation also adds cost, especially if the old cladding needs to be removed, the framing needs repair, or scaffolding is required. When these steps are missing from the estimate, the difference between calculator results and contractor quotes becomes noticeable. Including expected labour and prep costs helps you build a more reliable budget.
Ignoring Regional Differences
Cladding costs are not the same across New Zealand. Factors like transport fees, availability of skilled installers, and local supplier pricing all influence the final number. A calculator that does not adjust for your region may show an estimate that looks lower than the real cost in cities where labour rates are higher. This is why two homeowners with the same house size can get different quotes even when choosing the same material. Always consider your location when interpreting results.
Not Factoring In Maintenance
A calculator usually gives a one-time installation cost, but some cladding types require ongoing care. Materials like timber need repainting or staining, while others may need periodic washing or minor repairs. If you only look at the upfront cost, you may end up choosing an option that costs more over the lifetime of the home. Thinking about maintenance as part of your long-term budget helps you avoid unexpected expenses in the future.
How To Avoid These Mistakes
You can avoid these common errors by taking accurate measurements, researching labour rates in your region, and reviewing all parts of the installation process before using any calculator. It helps to ask local builders for insight into site conditions, maintenance expectations, and potential framing issues. Using the calculator as a starting point rather than a final figure gives you room to adjust your budget as you gather more details.
A little extra care during the planning stage often leads to better estimates and fewer surprises when you begin your cladding project.
When To Trust The Calculator And When To Get A Professional Quote
A cladding cost calculator gives you a fast estimate, but it cannot replace the insight of someone who has inspected your home in person. Use the calculator as a starting point, then rely on expert advice when the project becomes more complex or when your home has conditions that a digital tool cannot interpret.
Signs Your Estimate Is Close
You can trust the calculator when your home has a simple exterior layout with clear measurements. A single level house or a straightforward rectangular shape usually returns results that sit near professional quotes. If you already know the type of cladding you want and you understand the general labour rates in your area, the calculator often produces a realistic range. Many homeowners also notice that their calculations align with what neighbours or friends paid for similar work, which adds another point of confidence.
Signs You Need Expert Input
A calculator cannot detect hidden issues inside your walls or assess damage caused by moisture. If your cladding is older, swollen, cracked, or shows signs of leaks, a professional needs to inspect the structure. Complex designs with multiple angles, high walls, or areas that require scaffolding almost always need builder input because these conditions increase labour time. If your estimate changes wildly as you adjust small details, that is another signal that the project needs human evaluation.
What Builders Look For That Calculators Cannot Predict
Builders check for structural movement, framing repairs, outdated moisture barriers, and installation challenges that calculators cannot see. They inspect flashing, window joinery, and areas where cladding needs precise cuts. These factors change the entire scope of work and can shift costs in ways a calculator will never catch. A builder also knows how to price for site access, safety requirements, and regional labour availability, which make a noticeable difference in final pricing.
Questions To Ask A Contractor
Ask the contractor what specific factors affect your quote and how they measured the scope of work. You can also ask whether the material you chose fits your climate and long term maintenance goals. Request a breakdown of labour, materials, scaffolding, and potential repairs so you understand where each dollar goes. If the quote includes optional upgrades, ask how they influence durability and cost. These questions help you see the value behind the number, not just the total.
How To Compare Two Very Different Quotes
Start by checking whether both contractors included the same materials, labour details, and site preparation steps. A low price sometimes means certain tasks were left out, while a higher quote may include weatherproofing, repair work, or better quality materials. Look for consistency in measurement methods and ask each contractor to confirm how they calculated the square metres involved. When you line up the details side by side, you can see which quote reflects the full scope of your project.
This part of your planning helps you move from general estimating to informed decision making, giving you a clearer sense of when a tool is enough and when expert advice becomes essential.
Tips For Reducing Cladding Costs Without Lowering Quality
Saving money on cladding does not mean cutting corners. You can keep your home protected, stay on budget, and maintain a solid finish by making a few practical choices before the work begins.
Choosing Materials With Lower Long-Term Maintenance
Material choice plays a major role in your overall cost. Some options may cost a little more upfront but save you money over time because they need fewer repairs or treatments. Fibre cement and metal cladding are good examples. They hold up well in New Zealand’s varied climate and do not require frequent staining or repainting. When you compare materials, think about how much time and money you want to spend maintaining your exterior in the next ten to twenty years. Lower maintenance means fewer unexpected costs and a longer lifespan for your investment.
Preparing The Site Early
A well-prepared site helps your installer work faster and reduces the chance of delays. Clearing access paths, trimming nearby plants, and removing old fixtures allows the team to set up quickly. If you plan to remove old cladding, arrange this before installation starts or ask your builder what preparation you can handle yourself. Simple steps like these reduce labour hours, which directly lowers your final bill. You also avoid extra charges that come from last-minute adjustments during the project.
Getting Quotes During Less Busy Seasons
Labour demand changes throughout the year. Builders are often booked out during warmer months, making it harder to secure competitive prices. Requesting quotes during quieter seasons gives you a better chance of finding cost-effective options. Installers may offer more flexible timelines or reduced rates when workloads are lighter. Even if you are not ready to start right away, getting early quotes helps you understand your budget and decide on the best time to schedule the job.
Asking Suppliers About Off Cuts Or Bulk Pricing
Material suppliers sometimes have extra stock, discontinued lines, or off cuts that still meet high quality standards. These can work well for certain cladding styles and help you reduce the project cost. Bulk pricing is another option if you need a large amount of material for your home. When you contact suppliers, ask about current offers or items they want to clear. Small savings on materials add up quickly, especially when covering a full exterior.
Checking If Your Existing Framing Needs Repairs Before You Start
Hidden structural issues can turn a straightforward cladding job into an expensive repair project. Before installation begins, ask your builder to look at the framing and weatherproofing. Addressing problems early prevents extra labour during the install and keeps your new cladding secure for years. When everything beneath the surface is sound, the installation runs smoothly and avoids unexpected costs.
A little planning goes a long way when it comes to managing cladding expenses. These steps help you stay within budget while keeping the quality of your project strong. If you want help creating a custom plan based on your home, I can draft one for you.
Simple Checklist Before Replacing Cladding
A clear checklist helps you prepare for a smooth cladding project and prevents unexpected delays or extra costs. Each step guides you through the decisions homeowners often face so you can move forward with confidence.
Measure Your Exterior Correctly
Start by taking accurate measurements of every exterior wall. Write down the height and width of each section and include areas with windows or doors. Small mistakes can affect material estimates and lead to shortages or overspending. If you are unsure, ask a builder to confirm your numbers so your calculations stay reliable.
Decide On The Finish You Want
Think about the look you want for your home. Some homeowners prefer a modern style with clean lines, while others stay with traditional timber or brick. Your choice affects both the cost and the long-term care your home will need. Look at samples, compare textures, and ask yourself what appearance matches your property and your budget.
Check Council Rules
Before you start any work, review your local council requirements. Some areas have rules on materials, colours, or structural changes. If your home needs consent, plan for the processing time to avoid project delays. This step also protects you from compliance issues that may cause problems when selling your home later.
Review Weather Conditions For The Install Period
Weather plays a large role in cladding projects. Poor conditions can slow down installation and affect the quality of the finished work. Look at the forecast for your chosen period and aim for a time when the weather is steady. This helps your builder stay on schedule and reduces the risk of moisture problems during installation.
Confirm Warranty Details For Materials
Each cladding product comes with its own warranty terms. Read them carefully so you know what is covered and for how long. Pay attention to any care instructions you must follow to keep the warranty active. A good warranty gives you peace of mind and supports the long-term durability of your home.
Keep At Least A Ten Percent Buffer In Your Budget
Unexpected costs are common during exterior projects. Set aside at least ten percent of your total budget to handle surprises such as minor repairs or extra labour. A buffer makes your project less stressful and helps you stay on track even if new issues appear once old cladding is removed.
This checklist keeps your project organized and reduces the chance of setbacks. Small steps taken early can save you money and prevent problems later.
Step-by-step: Use The Cladding Cost Calculator NZ To Create A Project Plan
This section guides you through each stage of using a cladding cost calculator so you can build a clear plan for your project. You will see how small details shape the final estimate and how to turn the calculator’s results into a practical outline you can follow.
Gather Your Home Details
Start by collecting the basic information about your home. You need the age of the property, the type of cladding you currently have, and whether any damage is present. These details help you understand what might affect cost, especially if your home needs repairs before new cladding can be installed. Having everything ready before you start keeps the process simple and reduces the chance of missing important steps.
Enter The Measurements
Next, calculate the exterior wall area of your home. Many people measure length and height for each wall and multiply them to get the total. If your home has multiple levels or unique shapes, break it into sections so the numbers stay accurate. When you enter these measurements into the calculator, you get a cost estimate based on the actual size rather than a rough guess.
Select Materials
Choose the cladding material that matches your style, budget, and long-term goals. The calculator often includes options like fibre cement, timber, vinyl, metal, and brick. Each material has its own price range and maintenance requirements, so think about how much care you want to put in after installation. Your choice has a major impact on the final estimate and the lifespan of your project.
Review The Estimate
Once you add measurements and material preferences, the calculator gives a cost range. This number helps you see whether your expected budget matches the reality of the project. Look closely at what makes up the estimate, including materials and any assumptions about installation. The goal is to decide whether the estimate feels realistic for the size and condition of your home.
Adjust For Labour And Extras
Labour costs can vary based on your region, the complexity of the job, and the availability of skilled installers. Extras such as scaffolding, waste removal, insulation upgrades, or weatherproofing work also add to the total. Use the calculator’s adjustment options to update your figure so it reflects everything your job requires. This helps you avoid surprises later.
Create A Basic Timeline And Budget
After adjusting the estimate, turn the results into a simple project plan. Set your preferred start date, estimate how long each stage will take, and outline the total cost you expect to pay. Include a small buffer for unexpected issues such as minor repairs or delays caused by weather. A timeline keeps the project on track, while a realistic budget supports smarter financial decisions.
What You Should Do Next After Getting The Result
Once you have your estimate and plan, compare it with quotes from local contractors. Builders can confirm whether the calculator reflects current market conditions and point out factors the tool might not include. Use their feedback to refine your timeline and expected costs. The goal is to move from a rough estimate to a clear and actionable project roadmap.
This step-by-step approach helps you turn a simple calculator result into a practical plan you can rely on. By preparing accurate details, reviewing your options, and confirming estimates with professionals, you set yourself up for a smoother and more predictable cladding project.
Ready to get accurate cladding estimates for your home? Visit our website now to use our simple calculator, compare materials, and plan your project with clarity.
References
- Ultimate Guide To Cladding Costs Per Square Meter NZ
https://builderconnect.co.nz/blog/cladding-costs-per-square-meter-nz/ - Wall Cladding Types and Prices in NZ
https://arcline.co.nz/wall-cladding-types-prices/ - How Much Does Exterior Cladding Cost in New Zealand
https://forte.co.nz/articles/how-much-does-exterior-cladding-cost-in-new-zealand - Average Cost To Clad A House In NZ
https://builderconnect.co.nz/blog/average-cost-to-clad-a-house-in-nz/ - Guide To Wall Cladding Choices and Costs in New Zealand 2025
- https://www.cndla.co.nz/knowledge-insight/your-guide-to-wall-cladding-choices-and-costs-in-new-zealand-2025
FAQs: About Cladding Cost Calculator In NZ
What does a cladding cost calculator NZ estimate?
It estimates the price of installing or replacing cladding using details like home size, materials, labour, and site conditions.
How accurate is a cladding calculator for NZ homes?
It gives a close starting estimate, but final costs depend on quotes from local builders and material suppliers.
Why do cladding prices vary across New Zealand?
Regional labour rates, transport costs, supply availability, and weather conditions lead to price differences.
What details do I need before using a cladding calculator?
You need your home’s measurements, chosen materials, and any expected extras such as insulation or old cladding removal.
Which cladding type is the most cost-effective in NZ?
It depends on your project, but fibre cement and vinyl often offer lower upfront costs with reasonable durability.
Does the calculator include labour costs?
Most calculators provide a labour estimate, but actual rates vary based on complexity and local demand.
Do I need council approval for cladding replacement?
Many reclad projects require approval, especially when weatherproofing or structural work is involved.
Can I use the calculator for new builds and renovations?
Yes, the tool works for both, as long as you provide accurate measurements and project details.
What factors increase cladding costs the most?
Complex home shapes, scaffolding, material choice, labour demand, and removal of old cladding often raise the total.
When should I get a professional quote instead of relying on a calculator?
If your home has hidden damage, unique design features, or uncertain weatherproofing issues, a builder’s quote is essential.
Conclusion
A cladding cost calculator in NZ gives you a clearer starting point when planning a renovation or new build, helping you understand your likely budget before you speak with any contractors, and guiding you through the early decisions that shape your overall cost. It also encourages you to compare a few estimates instead of relying on a single quote, giving you a stronger sense of what is reasonable for your home size, location, and material preferences. As you review your options, take time to explore materials that offer long-term savings through lower maintenance needs or better durability, since these choices often deliver more value over the life of your home. With the right information in hand, you can move forward with confidence and make choices that support both your budget and your goals.